

Hot Papercraft How-Tos


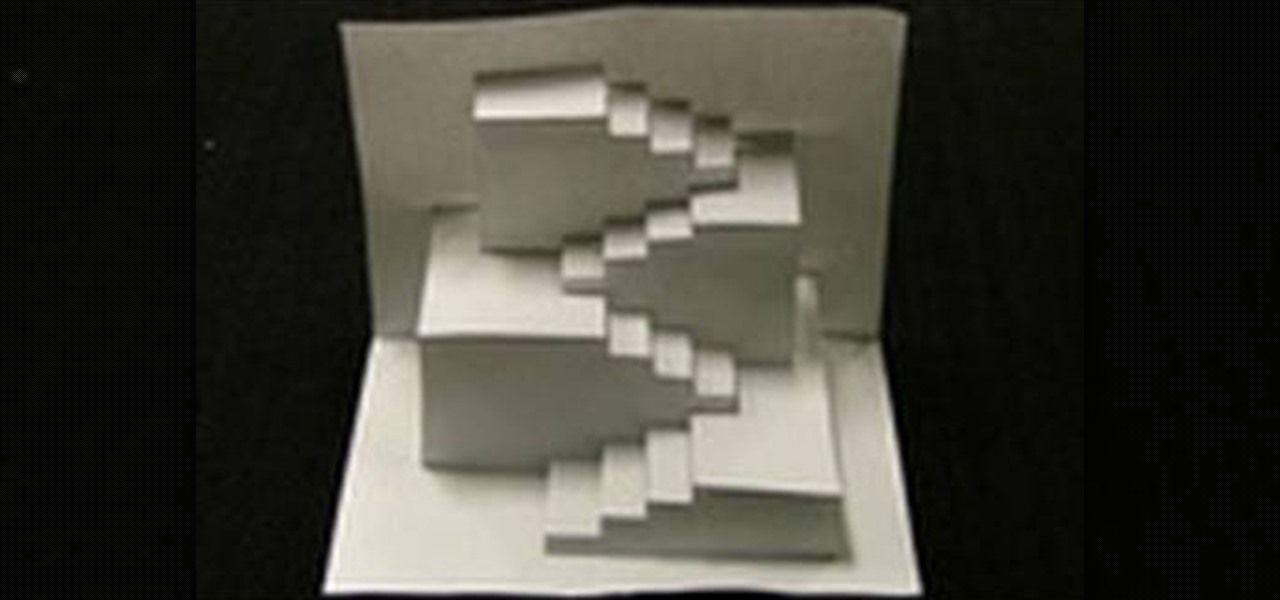
How To: Create an amazing 3D paper design
This video shows us how to create an amazing 3D design using a single sheet of paper. You will need: cutter printed template of the 3D design. Procedure: Download the template using this link. Print the template. Cut all the solid lines on the template. Fold all the broken lines on the template as shown. Arrange the paper in such a way that it looks like the 3D design shown on the video. Follow these steps and you will have your very own amazing 3D paper design!
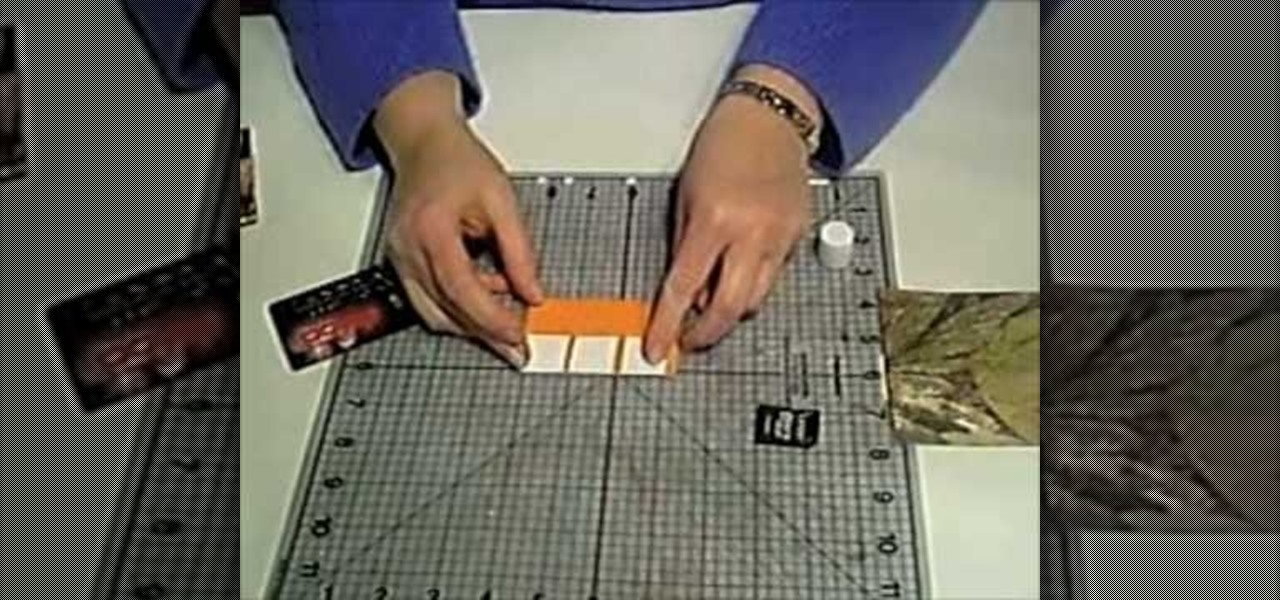
How To: Make simple tri-fold cards
Learn how to make simple tri-fold cards with these instructions. What you will need: -5 1/2" by 11" cardstock paper -Scorer -Scissors and paper cutter -Pencil and Ruler What to do: -Score the cardstock to 3" by 7 1/4" -Using the 3 3/4" flap, from the corner measure 2 1/2" and mark with a pencil. -Repeat on the horizontal side of the cardstock. -Cut the corners using the marks as your guide. -Round the pointed end with your scissors. -Fold the card at the score line. -Embellish your card as de...

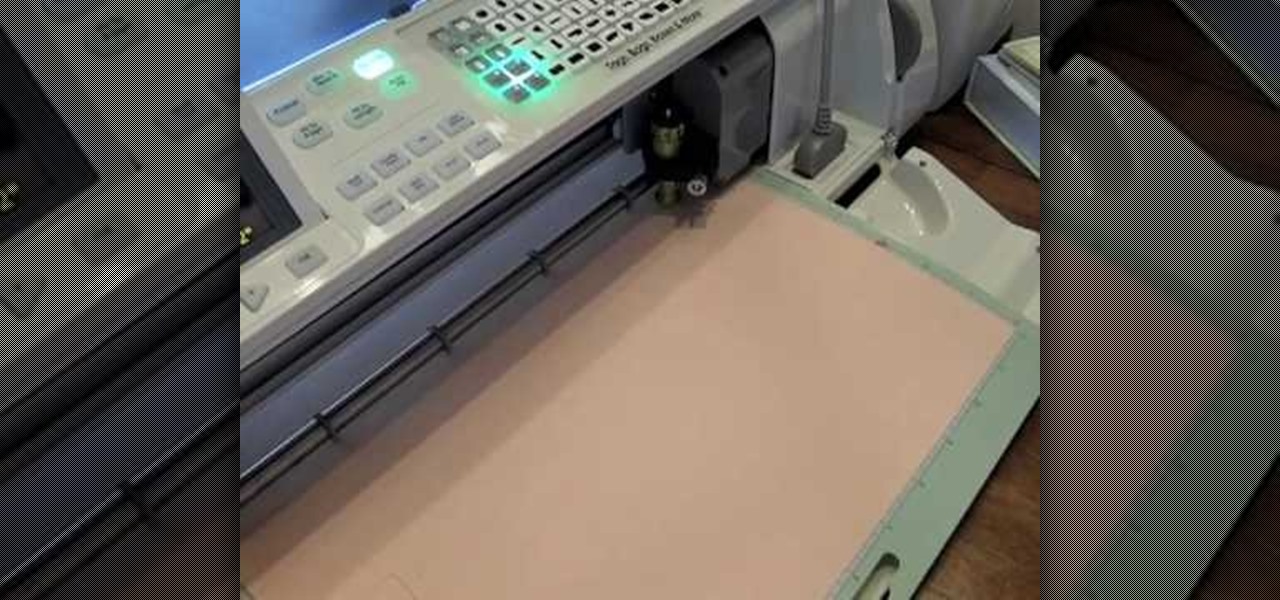
How To: Make a thank you card using Cricut Walk In My Garden
Cardcrazy09 teaches you how to make a thank you card using Cricut. You will need the Walk in my garden cartridge for this. The card itself is a Martha Stewart piece of double sided cardboard. You will need different types of punches to create the white decorative part and the text card. That will be printed with black text. The flowers and the pot are created using Cricut. The pot is placed on top of the flowers and each of them are individually stuck onto the card. Also make sure to add a so...
How To: Make a DIY zine with paper & scissors
If paper art is your forte and you are looking for some new and exciting ideas to do with paper, then your search ends here. Watch this video and teach yourself how to make a do-it-yourself zine. Sam Proof tells you how to make a zine in minutes. You will be needing a sheet of paper, a pair of scissors and a pen. The instructions are all very easy to follow. You can use this idea to create your own comic booklet or anything that needs printing in a zine.
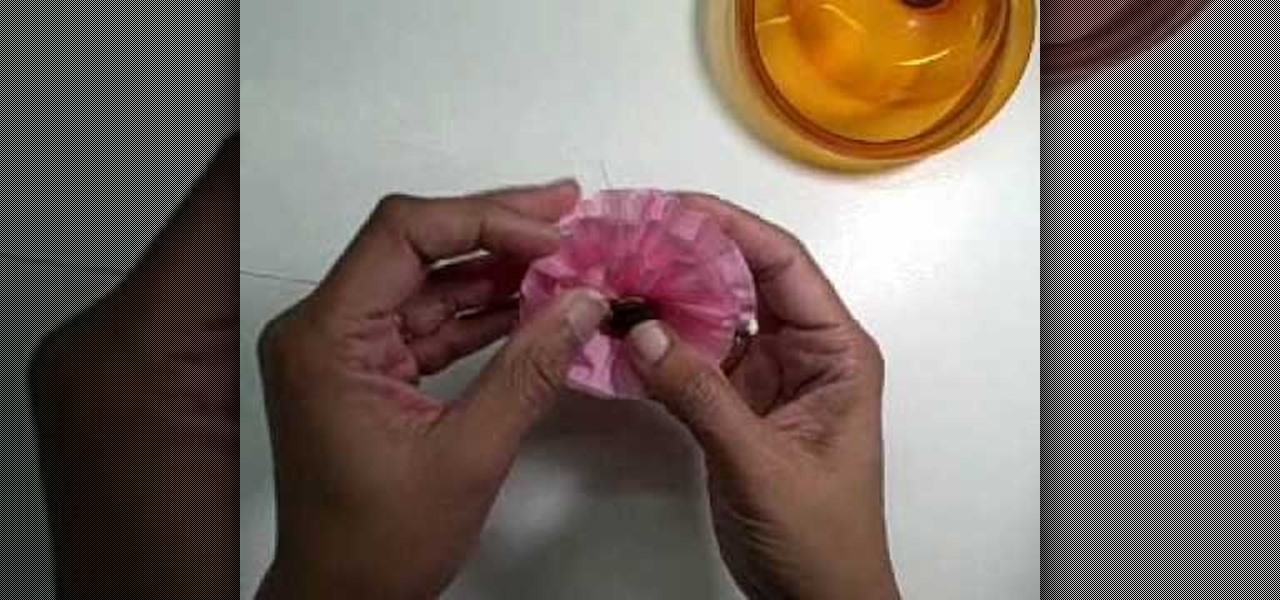
How To: Make crepe paper flowers
Becca from Amazing Paper Grace demonstrates how to make crepe paper flowers. The supplies needed are a roll of crepe paper, scissors, a ruler, and a sewing machine or needle and thread. Measure a yard of crepe paper and trim it narrower if you want a smaller flower. Use the sewing machine to sew a straight stitch along one edge with the longest stitches. Pull the thread to gather the paper so it curves around to form a flower shape. Layer the curves around in a spiral to form the flower. Feed...
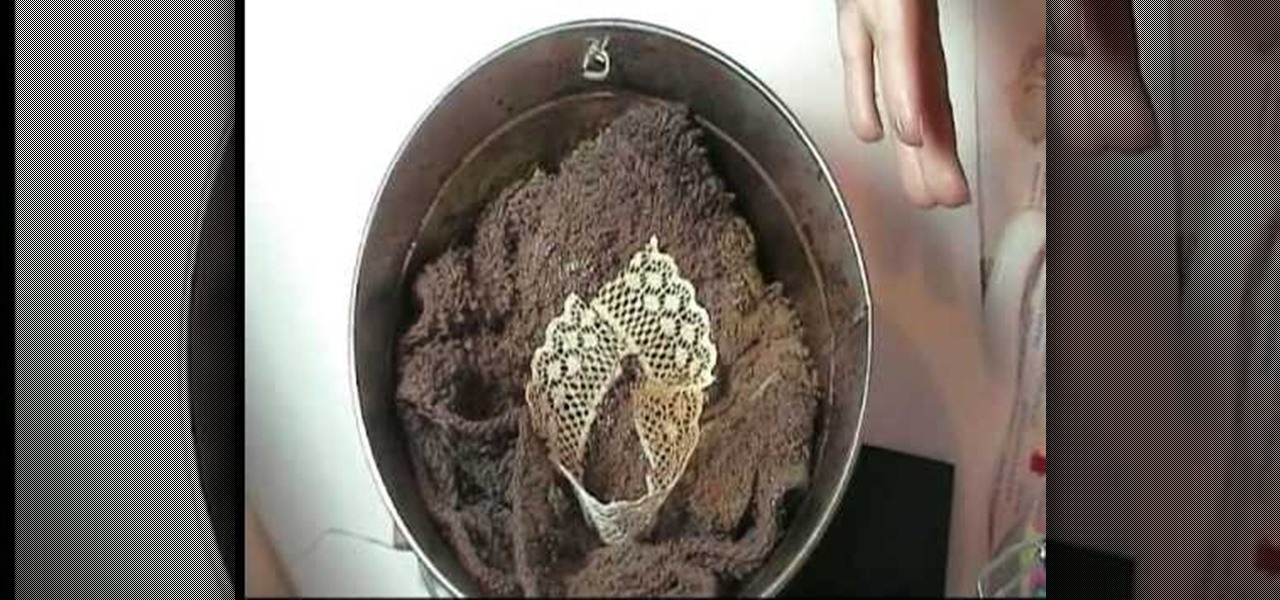
How To: Make new lace look old
Marion teaches us how to use a technique involving lace and glitter mist to make the lace look vintage. The lace can be placed in a bucket to spray the glitter mist from Tattered Angels onto the lace. Doing this in the spray bucket allows you to avoid spraying anything else in your work area. Marion uses the Old Lace Glimmer Mist, Suede, Cream de Coco, and Sherbert spray colors for this technique. This combination of the sprays allows you to create an old and vintage look on lace that can be ...
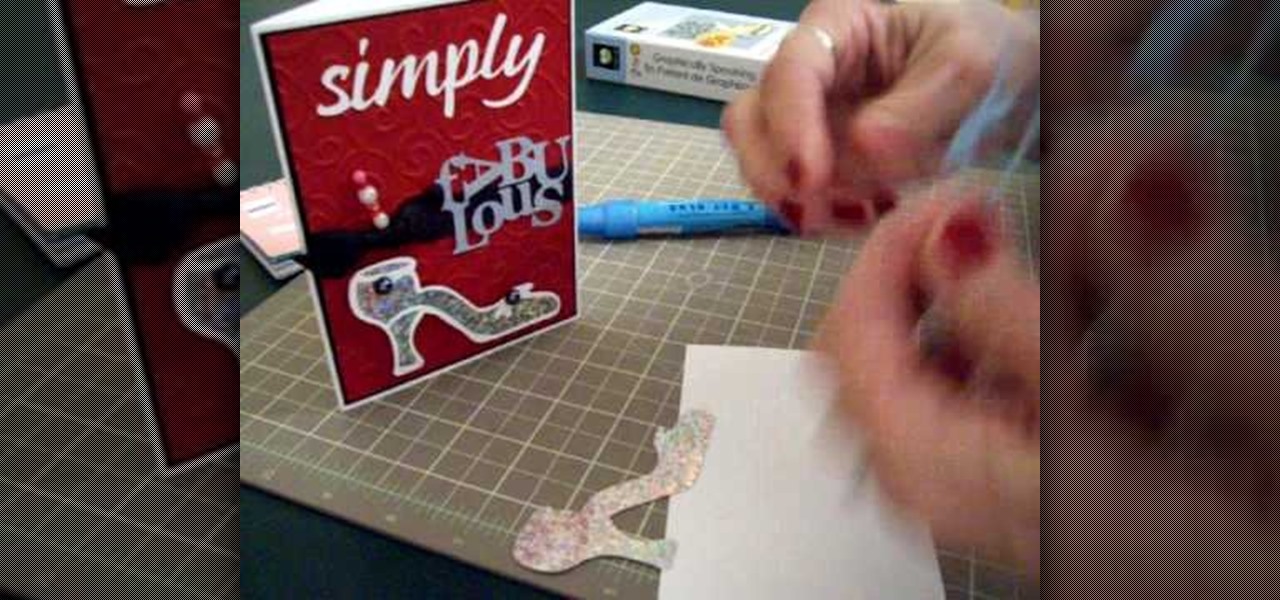
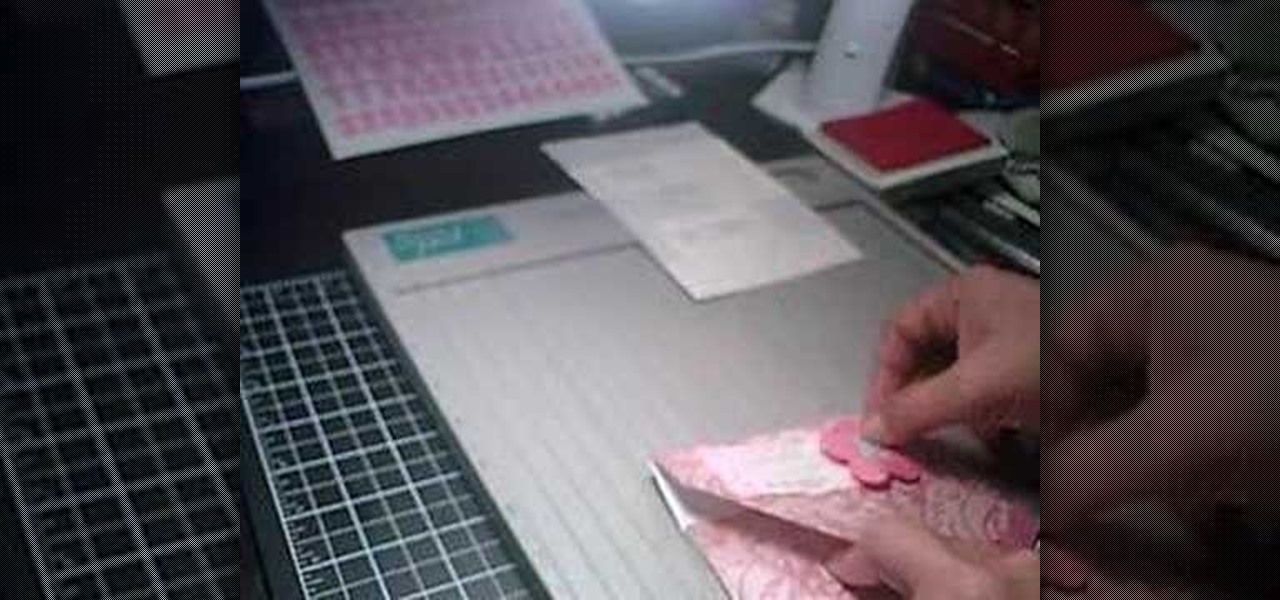
How To: Make a "simply fabulous" card using Cricut G.S.
Mary demonstrates how to make a card using graphically speaking cartridge, in this video. She cuts out the outline of a heeled shoe and the image of the shoe in silver, both measuring 2 inches. Then the words fabulous and simply are cut out, both measuring 1.5 inches. The outline of the shoe is then glued onto the silver cutout of the shoe. The high heeled shoe is then pasted onto the card along with some decoration. A pin studded with beads is affixed onto a black bow with green ribbons and ...
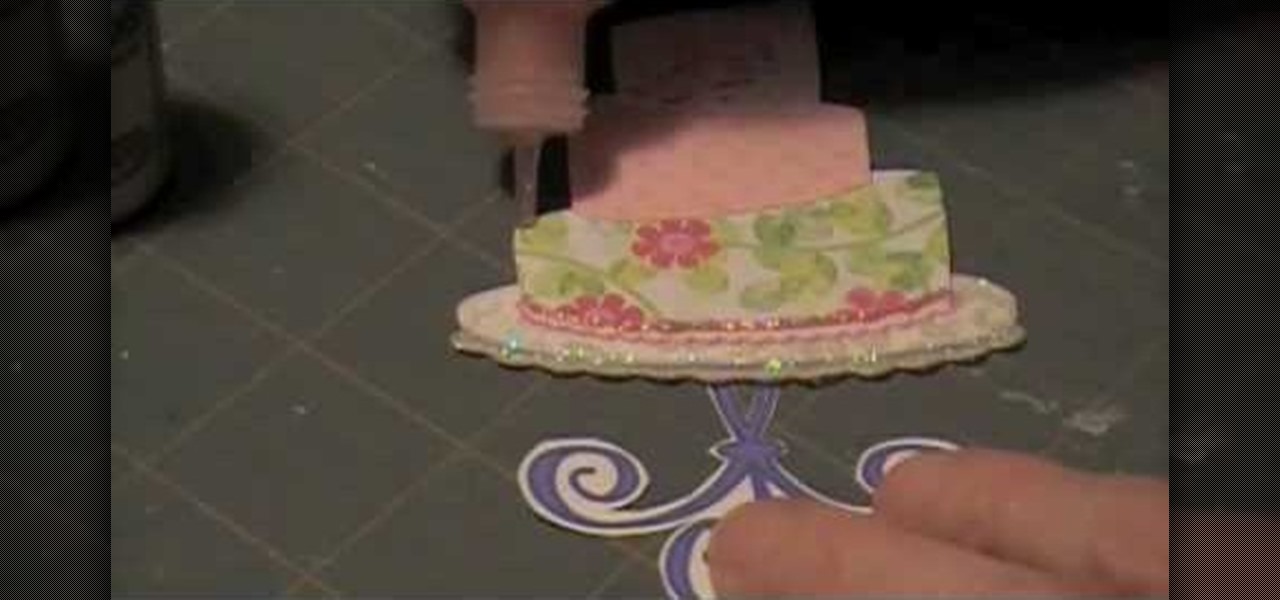
How To: Make a paper cake
1) Create a rectangular sheet of paper by folding the left side in, like a book, about 1-inch and remove this excess paper. 2) Fold the rectangle in half, bottom to top like a newspaper, and then unfold and lay flat. Now take the bottom edge and fold it up (again like a newspaper) to meet the center crease that you made with your first fold. Unfold again. You will now have two creases in the bottom half of your paper. 3) Lift the bottom fold (bottom forth of the rectangle) up and line it up w...
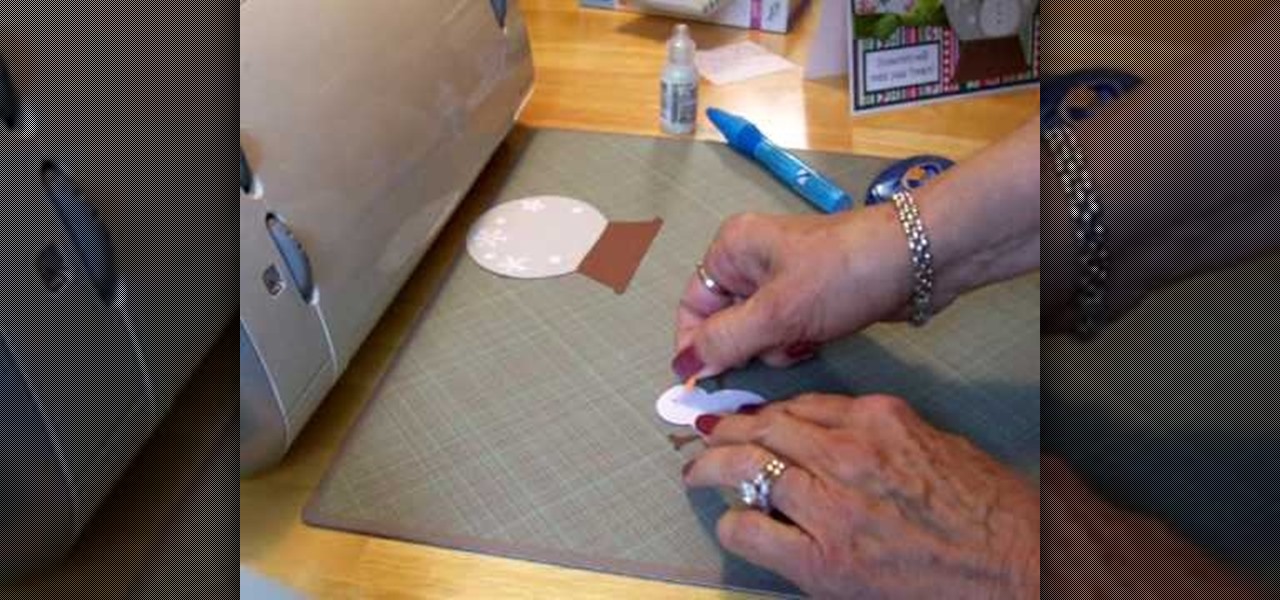
How To: Make Cricut snow globe card
Cardcrazy09 teaches us how to make a Cricut snow globe card. You cut the base of the snow globe in brown cardboard. You then add a layer of white with dots and snow flakes on top. The snowman is done using the same technique - black cardboard and then a white layer on top of it. You add the carrot nose by sticking it on. When all is dry, add the snowman on top of the snow globe, in the middle of it. You add the acetate layer on top of them. The end result looks like the class on a real snow g...
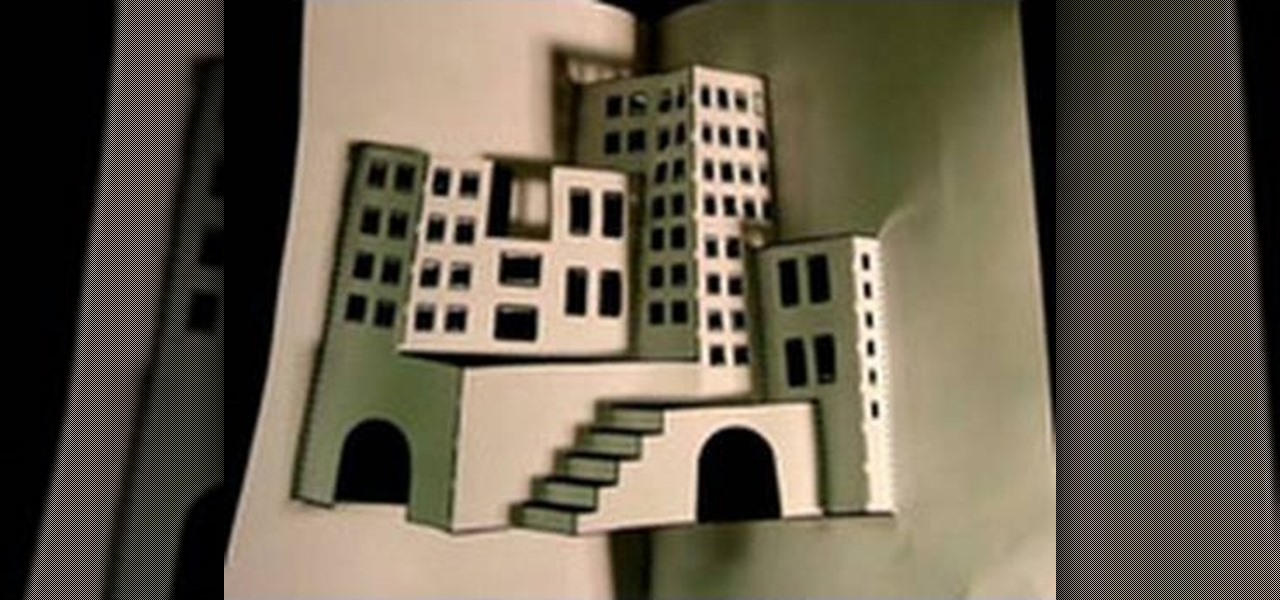
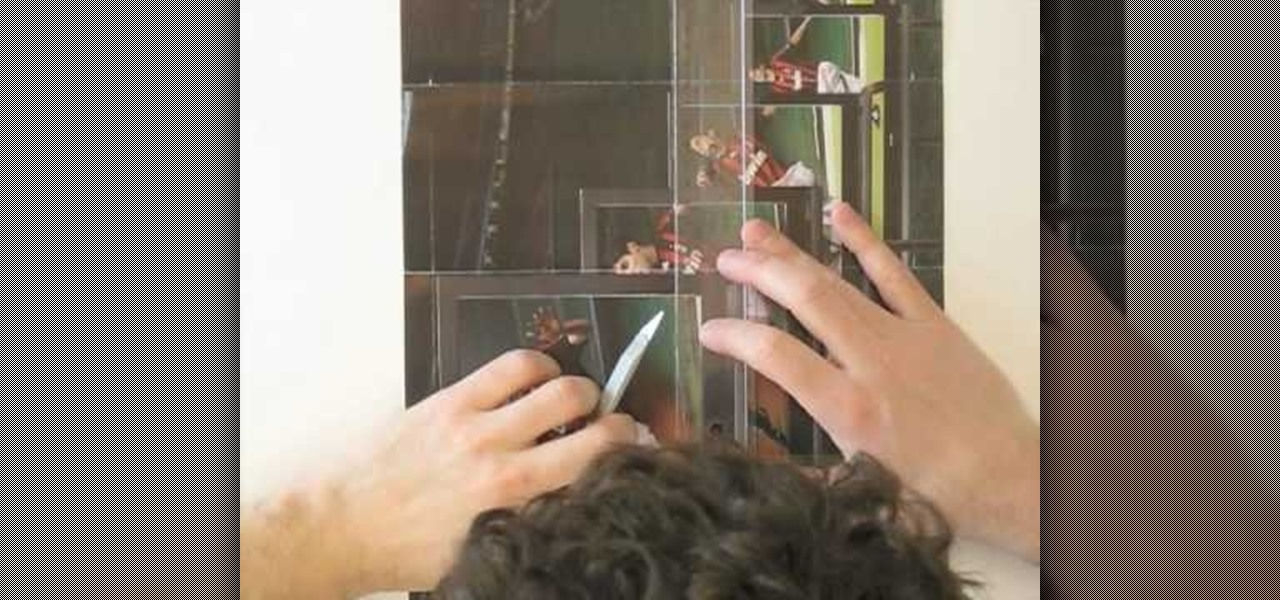
How To: Make a 3D paper city
Learn how to make a three dimensional city from a sheet of paper. Start with a flat drawing of a city scape and a sharp X-acto knife. Cut along each vertical line of each window. Cut along each horizontal line of each window. Be very precise and do not cut past the end of the line. Cut out arches of doorways. Make incisions along horizontal lines of buildings. Cut along horizontal lines of stairs. Do not cut along any dotted lines. Once done cutting, begin folding. Fold along dotted lines. Cr...
How To: Make a paper wallet out of an old magazine
Recycle, reduce, reuse...and follow this video to learn how to make a paper envelope out of an old issue of Wired Magazine. Now, if only making money could be this easy.

How To: Make a photo frame out of a magazine page
So now that you've read your Wired cover to cover (And back again) what are you going to do? You're going to turn it into a photo frame for your favorite geek! Just follow the steps in this video and you'll have your very own unique photo finish.
How To: Make a SD/camera memory card sleeve
Do you lose your SD memory card when you need it the most? This video will teach you how to turn your problem into a fun arts and crafts project! The video teaches you how to create a fashionable sleeve to store your SD memory card. Not only does it look great, it will create a safe place to store your SD memory card. If you finish the video, you can create your own sleeve and make your life a lot easier by storing your SD cards safely.

How To: Make a photo wallet
Corinne from crafts beautiful magazine teaches how to make a photo wallet. Get an A4 colored paper. Fold about an inch on both short edge and one of the remaining 2 longer edges. Bring the top part to the bottom of the longer edge and tuck it inside the fold. Divide into three. Put a ribbon around it and decorate the way You want it. Follow these steps and You'll be able to make Your own photo wallet.
How To: Eco gift wrap your presents
Tracy Hepler and Jaclyn Mullen of YDT TV demonstrate how to gift-wrap your presents in an environmentally conscious way. You will need: newspapers, scissors, tape, and lace or ribbon. Use a daily newspaper page instead of wrapping paper. A lot of paper is usually wasted around the holidays, and recycling newspapers is a great way to minimize this waste. Cut the newspaper to fit the size of your gift and place your gift in the middle of the sheet, as you normally would with ordinary wrapping p...

How To: Make Halloween cards with Cricut Wild Card
This video shows an easy way to make Halloween cards with the Wild Card Cart. Mary is our guide in this tutorial showing us how to use the Wild Card cart in order to make some great cards for Halloween. The video is very helpful, and you start by finding out the exact page where you can get everything you need for a great and scary card. For a boost of imagination you can take a look at Mary's two examples, a bat card and a spider one.

How To: WIRED UNPLUGGED. How to make a DVD sleeve with wired m
Is the printed publication doomed to follow the dinosaurs? Not so fast. This video demonstrates how easy it is to recycle your favorite issue of Wired into a DVD or CD sleeve. Save a CD and a tree! Now it's all just a matter of how long CDs and DVDs are going to last....
How To: Use Child's Year Cricut cartridge for a Christmas card
This video is about how to use Child's Year Cricut cartridge for a Christmas card.
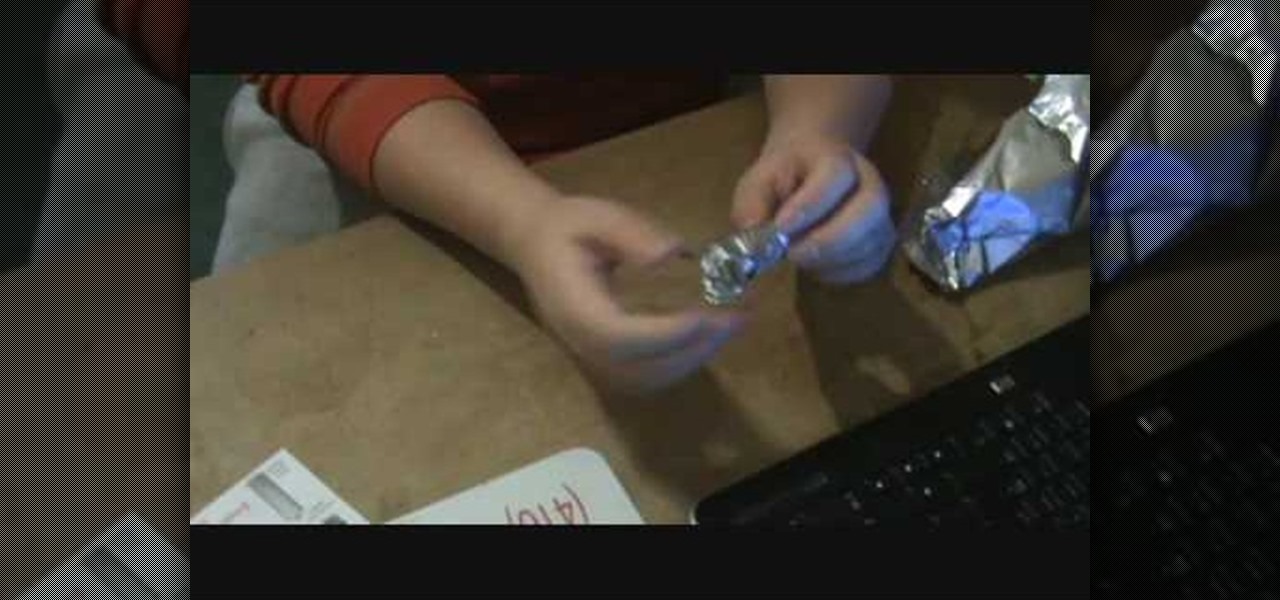
How To: Make a tinfoil bullet for a paper gun that shoots far
This video teaches the secret of making a tinfoil bullet for a paper gun that shoots far. An excellent summary is given below. First start by rolling the tinfoil leaving one side wide and the other side narrow. After rolling it up tear a little piece from the narrow end of the tinfoil. Open it up, insert your finger inside and adjust till it becomes cone shaped. Now put that in your gun and shoot, it will go far as expected. Add some weight if you want to make it go longer. Follow the above t...
How To: Fold a floating paper boat
This video is about how to make a paper floating boat by using only a single paper. These boats are really liked by the children in rainy season and they play with them where water gets collected or some kind of lakes or ponds. It can be made by just folding the paper in three folds and opening it to make a boat. This boat is easy to make and can be used as toys ,decoration material etc. boats are just childhood memories.

How To: Make a mini uzi out of paper
Learn to make this easy mini paper Uzi gun for gaming with your friends! Supplies: Scissors, Scotch tape (Note: DO NOT USE MASKING TAPE OR DUCT TAPE; IT WILL NOT TURN OUT WELL), lots of paper. 1. Take one piece of paper and roll it up from top to bottom to make a short tube. Tape it. 2. Take another sheet of paper and do the exact same thing that you did to the first one and tape it as well. 3. Take a sheet of paper and roll it up from side to side (long ways). Make the hole in the middle abo...
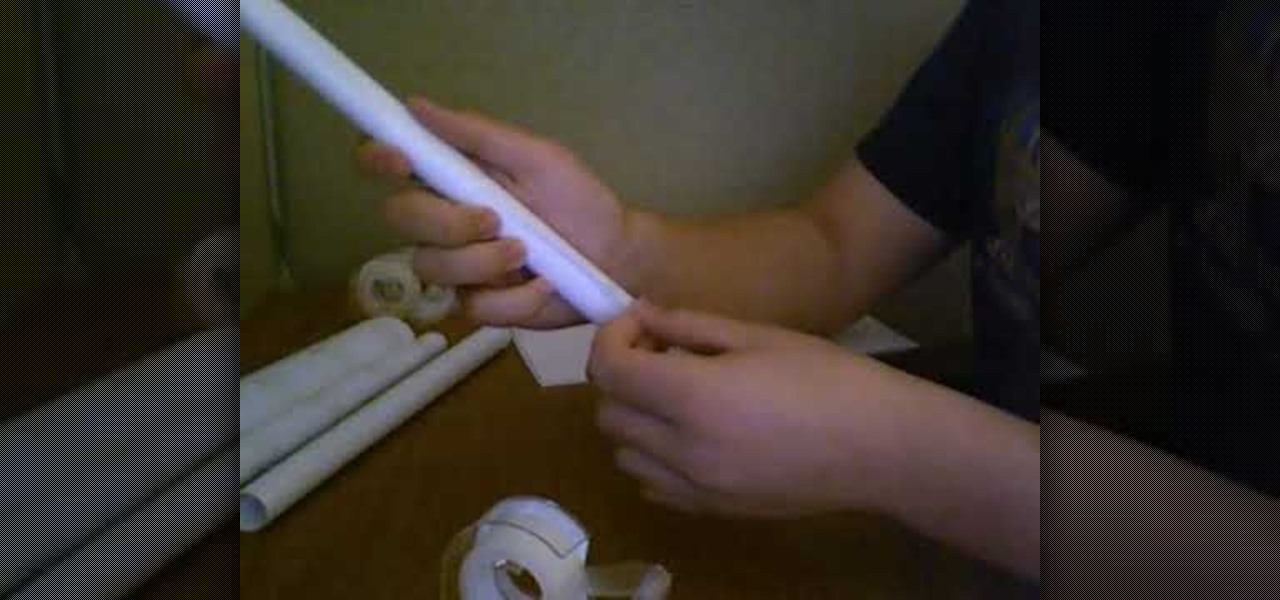
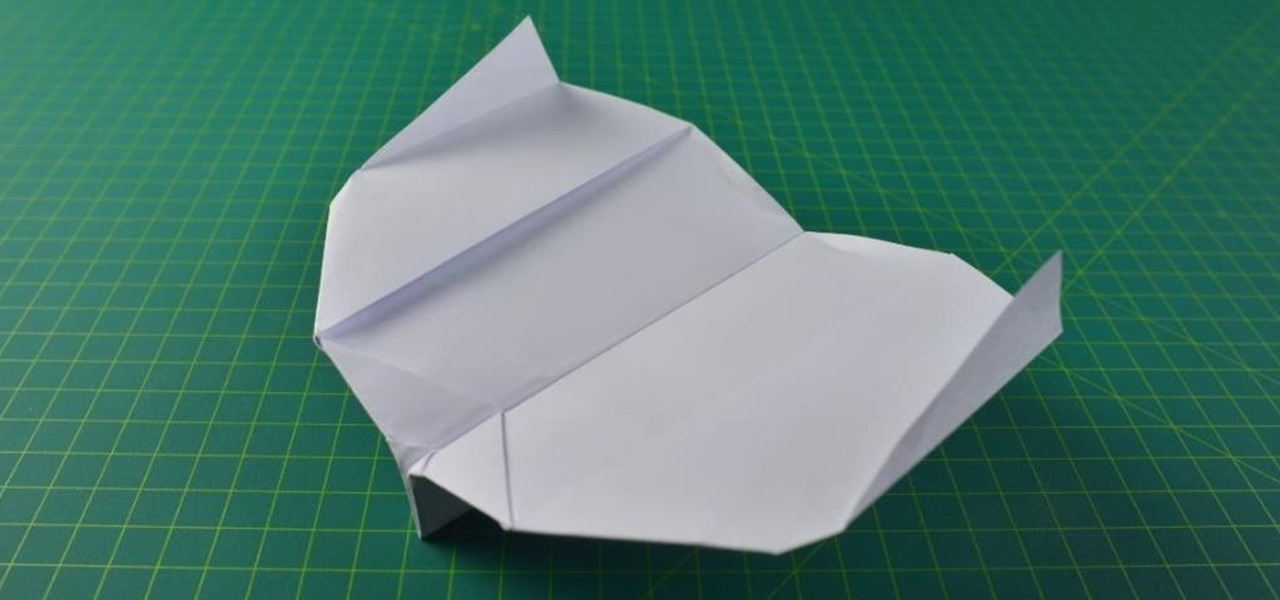
How To: Make a fast paper jet
Paper airplanes are awesome! You can have a lot of fun and impress your friend if you know how to make the right model.

How To: Make a stylish bird motif in minutes
Corynne from The Crafts Channel teaches how to make a stylish bird motif in minutes. You'll need: Colored/printed papers, scissors and glue. Get a colored paper. Draw a whatever bird image You like at the back. Cut with scissors. Get another colored paper of different color and draw a wing. Put a glue on the wing and glue it onto another colored paper. Cut it leaving 1/2 an inch over the first wing to have layers. Decorate bird as what You want Your bird motif to look like. Follow these steps...
How To: Make an AK-47 out of paper
Making an AK-47 gun out of paper is quite easy as shown in this video. You will need: scissors, tape and pieces of paper. ; Make four tubes by rolling each piece of paper and taping them beside each other. ; Take another piece of paper, roll it and tape it including the end sides. ; Attach this tube in the second tube of the four-piece tube you previously made. Tape them very well. You are now done with the shooting tube. ; Take another piece of paper, roll it and tape it. ; Attach this tube ...

How To: Make a paper cup mini album
Emerald City Elegance Paper Crafting with Joann is really very interesting to watch. It takes us through the process of making a beautiful paper cup mini album. It explains us to properly cut the edges of the paper cup, to stick first the color page in the folded paper cup, making ready the plain album pages and punching it altogether. Finally embellishments are also done to add beauty to the mini album. Now the album is ready. After watching this video, any viewer develops the art of creativ...

How To: Keep & file your leftover scrapbook scrap paper
Joann from Paper Crafting shares her tips in this video for filing and saving her scrap paper and card stock. She has created a new system where she uses "paper protectors". They must be clear and they should be intended to use more than one piece of paper. She then puts the scraps coordinated by color and paper type in the clear plastic protectors in a basket so they are always handy.

How To: Use Cricut Paper Doll Dress Up for a Christmas card
This how-to video shows you how to make a Christmas card using the Cricut Paper Doll Dress Up cartridge. Use the cartridge to cut out a tree. Use card stock for the base of the card. Use the Cuttlebug tree texture to create a background for the front of the card. Tie some ribbon around the bottom of the Cuttlebug paper. Attach to the front of the card. You can then add your tree and any other additions to the front of your card. This is a simple and quick way to make a Christmas card.
How To: Fold and fly a paper hang glider
Hang gliders are exciting, but if you can't fly in the sky, free as a bird, then try the next best thing-- making a paper version that you can make soar through the air. This four-part series from Science Toy Maker will show you exactly how to fold and fly an origami paper airplane hang glider, plus you'll get valuable information behind the principles that make it work. Also watch the last video for the principles that make it possible for life-sized hang gliders to move along the sky withou...
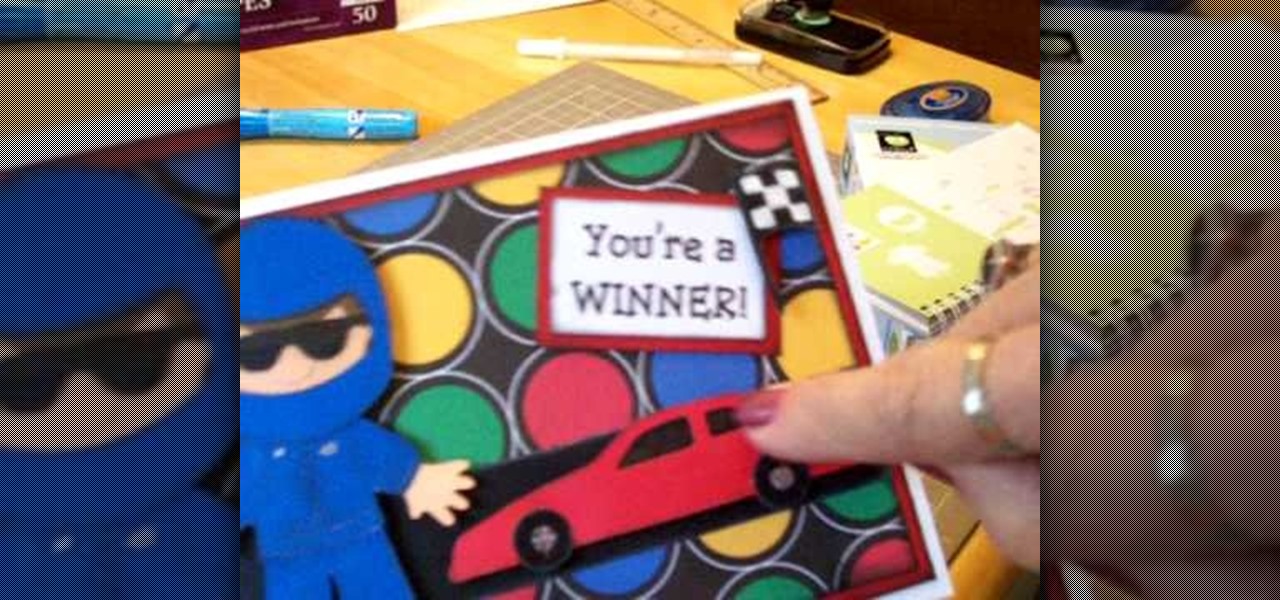
How To: Make a Cricut "you're a winner" birthday card
Learn how to personalize birthday cards with this informative video! This tutorial will show you how in just a few steps, you can make a race car birthday card with the help of a simple pattern. Why go out and buy a card from the drugstore that looks like everyone else's when you can create something unique for your birthday boy? All you will need to make this fun card is some colorful card stock, the Cricut racer paper doll pattern, glue, and a little time. This video also shows you how you ...
How To: Fold and fly a tumblewing walkalong glider
The science-fiction author, Arthur C. Clarke, once said, "That any sufficiently advanced technology is indistinguishable from magic". Who would have thought that we could create a wave of air with a piece of cardboard, and fly a folded sheet of telephone book paper on the wave of air? With this three-part video tutorial, you can find out how you can fly a piece of paper, making it surf on a wave of air. See how to make an origami tumblewing glider.
How To: Make a paper blowgun with a 50 foot range
Training to be a deadly assassin? Why not practice on something a little less dangerous, and make a homemade paper blowgun to begin with? In this two-part video tutorial, learn how to make a sturdy paper blowgun that shoots steel-top darts, and can shoot up to fifty feet. To make this paper weaponry, you will need: An old school notebook, scissors, tape, a hot glue gun, a soda bottle, and 2 paper clips.
How To: Use the Cricut Expression to make a gift bag
Mona from Cup Cakes Creations demonstrates the use of a Cricut Expression machine to make gift bags. She starts with the smaller gift bag found on page 115 of the instruction book. It gives the option of putting holes in the bag. She sets the machine to cut two 5-1/2" bags out of 12x12" paper, and cuts it. With the bag cut out, she explains how the bag is folded and taped with Terrifically Tacky Tape, and decorated with a 2" tag. The tag is attached with a cord, and decorated with a ribbon. T...

How To: Make a Christmas invite card using Cricut Very Merry
Mary, from Cardstv, shows you how to make a Christmas Card, using the fantastic Cricut machine by Provo Craft. She shows you how to use the "Very Merry Tags" Cricut cartridge to create a cute Christmas card with a Gingerbread man on the front of the card. Mary also shows you short cuts for your card embellishments. Giving you a variety of ways to create different cards makes this video a must to see. Enjoy make Christmas cards with Mary, just has she has enjoyed showing you this video.
How To: Make a paper snowflake for the holiday season
Need some affordable Christmas decorations? This is an instructional video that gives step by step instructions on how to make a paper snowflake. Viewers will learn how to make easy to make decorations for the holidays. You will need scissors, plain white paper, a stapler and tape to complete this projects. These are three dimensional paper snow flakes, not the typical two dimensional ones you probably made when you were in elementary school. Directions are easy to follow, and the video is cl...

How To: Make a paper sailboat that really floats
Check out this video for info on how to origami a paper boat. This is no ordinary paper boat, either! This boat actually floats! All you need is some paper, a bit of tape and your fingers and pretty soon you will have a fun new bath toy. Granted, it is still paper so it won't last long in water, but it sure does provide a cool effect when you first make it! And on a breezy day, your paper sailboat will take off like a kite!!
How To: Make a six sided paper snowflake
Most paper snowflakes are not representative of the proper 6-sided shape of snowflakes. This tutorial will show you a method which will allow you to make a beautiful and symmetrical realistic six sided paper snowflake. You will need to start with a square piece of paper, which you will then fold over diagonally to make a triangle shape. Taking the inner edge towards yourself, you will then need to fold the paper over into thirds and cut off the excess on an angle. After this, proceed as you w...
How To: Make a ribbon enclosed mini album
Making this DIY album is easy and fun! This video will show you how to make an 8x10 photo album enclosed in ribbon. After cutting two pieces of cardboard to size, you can take the material you've chosen for the cover and cut a 9x11 piece so that you can fold over the edges. After that, it's as simple as gluing the material to the backs of the cardboard and taking an extra piece of material for the inside cover. Good luck!

How To: Make a spider piñata
Are you expecting a party? Make your party fun by learning how to make a piñata! This tutorial teaches you how to make a piñata and design the piñata into a spider. This is great for a Halloween party. Upon completion of the video, you will also be able to make a piñata and design it into a spider. By showing the creation process, you can follow the instructions accurately and the piñata will look as though you purchased it from a party store.
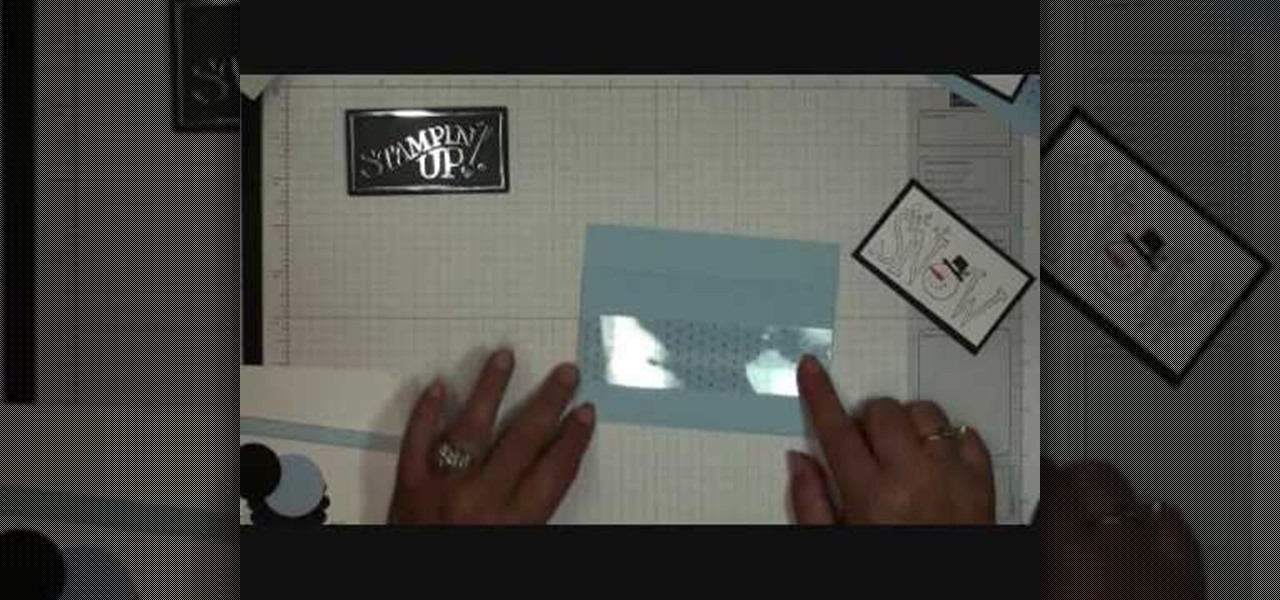
How To: Make a pocket card with Stampin' Up!
Crafter Dawn takes us through another arts and crafts card lesson. She outlines the steps to making custom pocket cards featuring a pull tab pop-up component on which you can store your message. While she has suggestions on how to make a snowman-themed card, you can use your imagination and creativity to decorate your cards for any season or occasion. Give someone something with a personal touch by following the steps in this video.
How To: Make your own creative business card holder
Joann from Emerald City Elegance teaches is how to make a creative business card holder in this short paper craft video.