


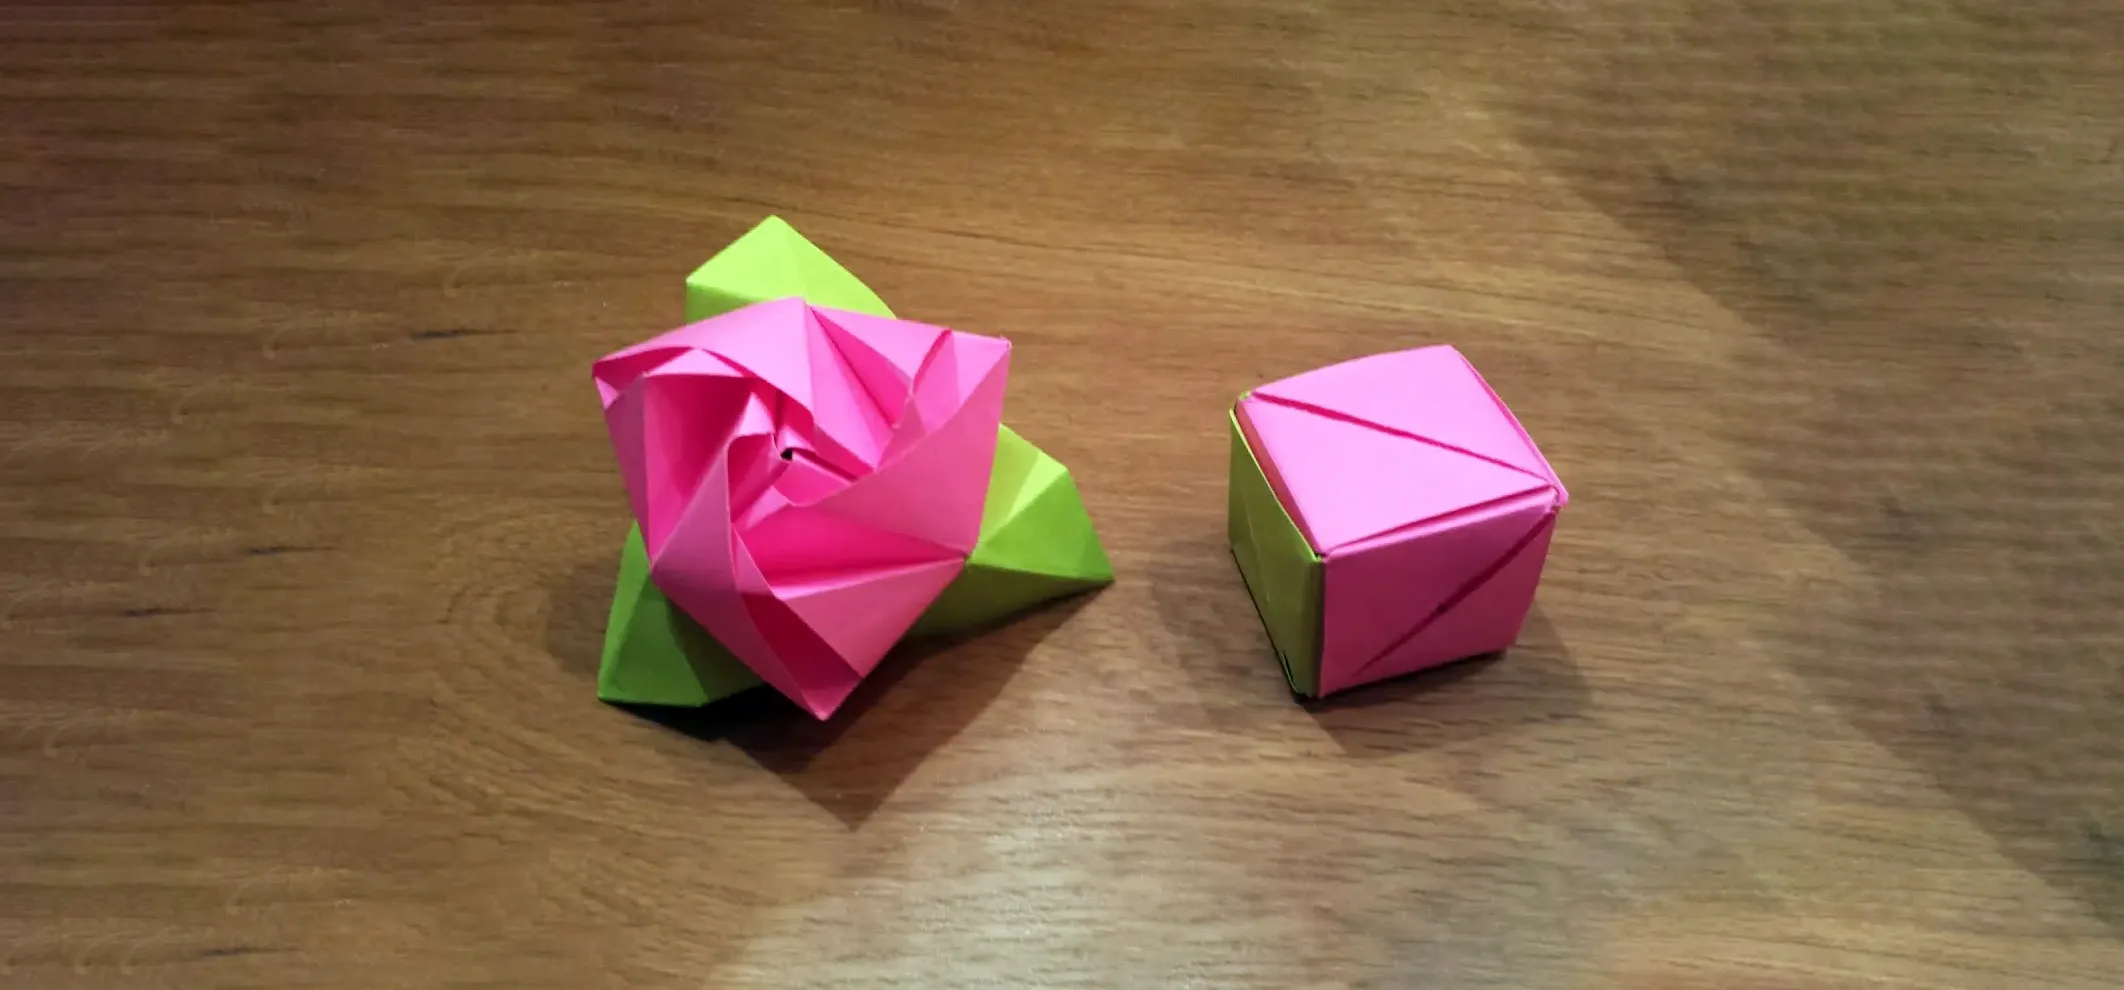
This origami model hides a beautiful secret. What looks like a simple cube at first transforms, with just a few gentle twists, into a blooming paper rose.
The Magic Rose Cube, designed by Valerie Vann, is one of origami's most elegant and surprising modular creations.
In this tutorial, you'll learn how to fold the Magic Rose Cube using six square sheets of paper. While it's more complex than a traditional crane, it's easier than many modular origami designs and delivers a stunning reveal. Best of all, it's collapsible, so you can switch between rose and cube forms anytime.
🎥 Watch the full video below to follow along step by step.
What you'll need
This is a modular model, so you'll fold the same units multiple times and assemble them.
Paper type: Standard printer or origami paper
Size: 10 cm x 10 cm (about 4 x 4 inches)
Colors:
3 green sheets (for leaves/cube sides)
3 red, pink, or any flower color (for the rose petals)
No cutting or glue is required — just accurate folds and a bit of patience.
Folding the units
Each of the six units (three green, three red) is folded the same way, with some reverse folds forming the cube's locking mechanism and rose details. The folds are mostly valley and mountain creases and require care to stay symmetrical.
Take your time on each module. The remaining five will go faster once you've folded one unit successfully.
Assembling the cube
Once all six units are folded, you'll interlock the flaps and pockets on each one to form a cube. The green modules comprise the exterior sides, while the red forms the internal flower.
Gently press the corners to collapse the cube into a blooming rose. With practice, the transformation becomes smooth and magical to watch.
Tips for success
Pre-crease everything carefully — crisp folds help with clean transformations.
Use thinner paper for easier shaping and locking.
If the rose doesn't transform smoothly, gently work the paper along the existing folds to loosen the layers.


Comments
Be the first, drop a comment!